Sunday, August 24, 2014

Hand Paint Faux Vintage Seed Packet signs

Vintage Crate Seed Packet Sign Art, FlowerPatchFarmhouse.com
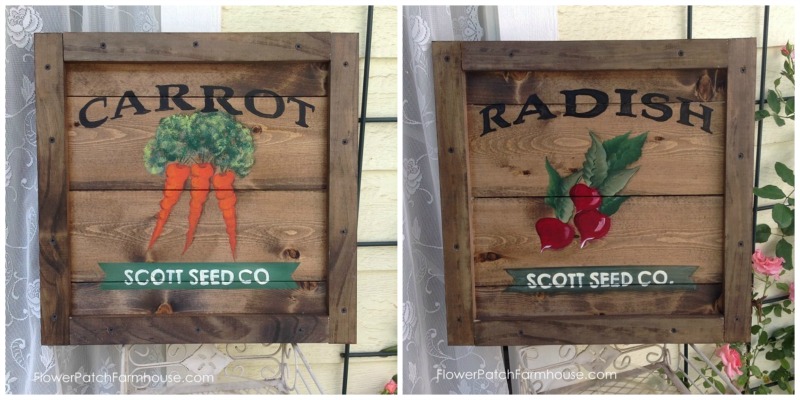
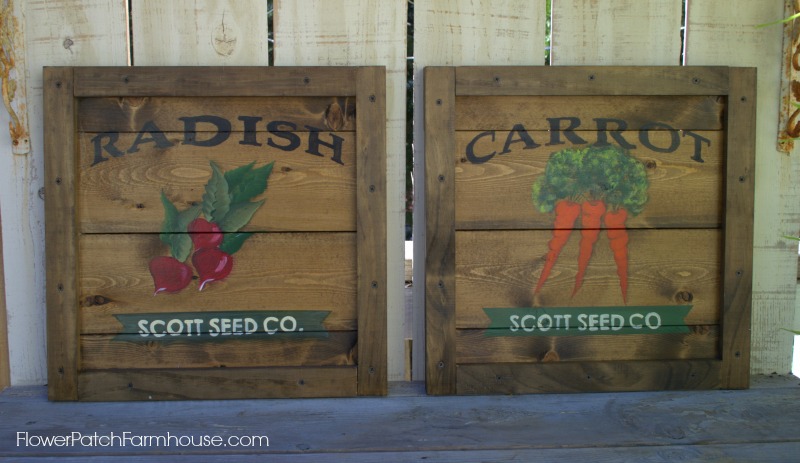
As promised in my last post I am back to show you how to paint the radishes and carrots to finish off your faux vintage signs.
If you missed the last post on building the faux crate sign just Click Here or on Photo Above
At the end of this post is a link to the pattern for these signs along with a supply list.
Nothing fancy, but it is what I had sketched up and/or printed for these and you might find them useful.
First lay out your pattern or copy the one in the link onto your surface with graphite paper.
Radish & Carrot Painting, FlowerPatchFarmhouse.com (16 of 36)
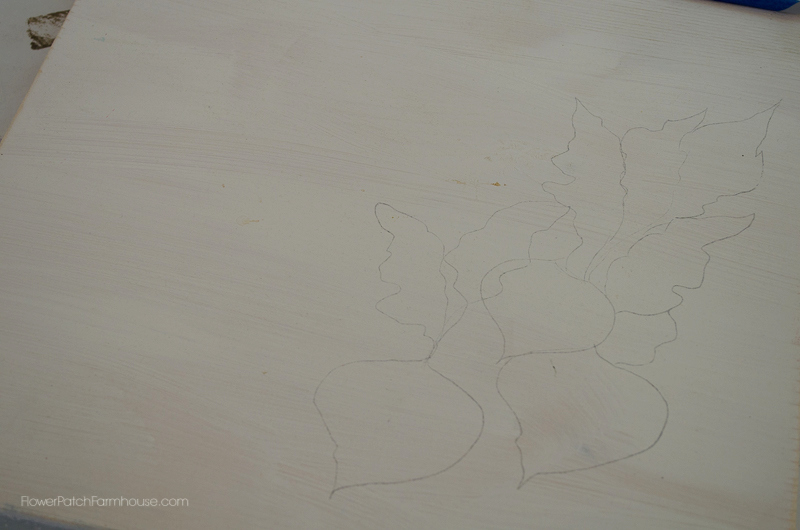
I used a #12 flat  to paint the background leaves.
Double load the brush with Black Forest Green and Avocado.
Stroke in the leaves using a elongated scallop stroke.
Radish & Carrot Painting, FlowerPatchFarmhouse.com (19 of 36)
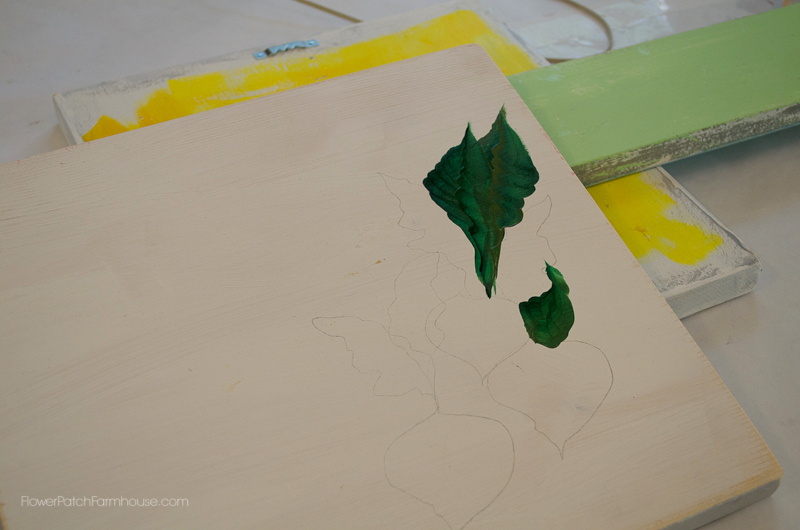
You can let that dry for a minute or two while you get out your next colors.
For the lighter leaves I used a #10 flat brush and double loaded with Avocado and Celery Green.
Again stroke in a elongated scallop stroke.
If you prefer you can let the first coat dry and do another to get the lighter green more opaque.
Radish & Carrot Painting, FlowerPatchFarmhouse.com (20 of 36)
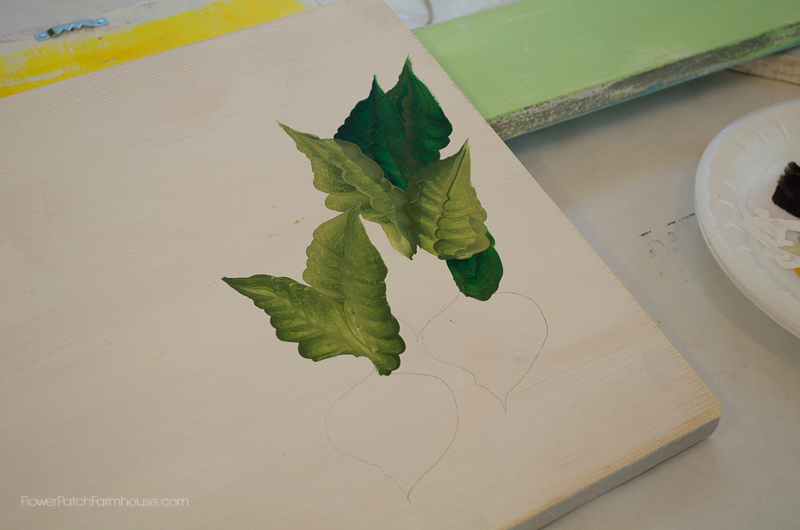
I did not get a photo of it but the  radishes needs to be undercoated with white at this point.
On a dark surface craft paints are dulled so if you want a color to show up brighter always undercoat with white.
After the white dries paint in the radishes with Cranberry Wine.
Reds are not opaque so you may want to do a couple coats.
After Cranberry Wine dries, then paint on some Alizarin Crimson on areas you want some brighter red.
Let that dry, then add a touch of Primary red.
Radish & Carrot Painting, FlowerPatchFarmhouse.com (25 of 36)
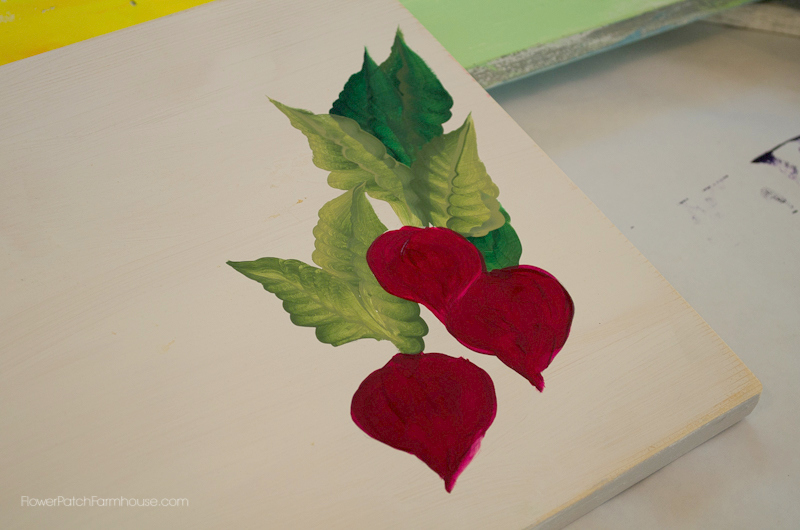
To add some highlights add a touch of white in a slight comma stroke to a curve.
And a line of white at the tip with the edge of your brush.
Add a shadow under the middle radish with cranberry wine mixed with a touch of black.
Radish & Carrot Painting, FlowerPatchFarmhouse.com (26 of 36)
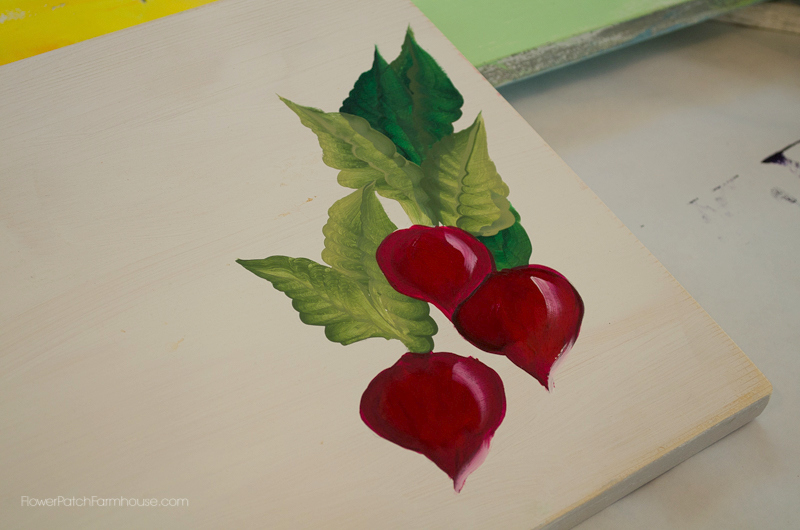
Now on to the carrot
Again draw on your carrots.
Radish & Carrot Painting, FlowerPatchFarmhouse.com (27 of 36)
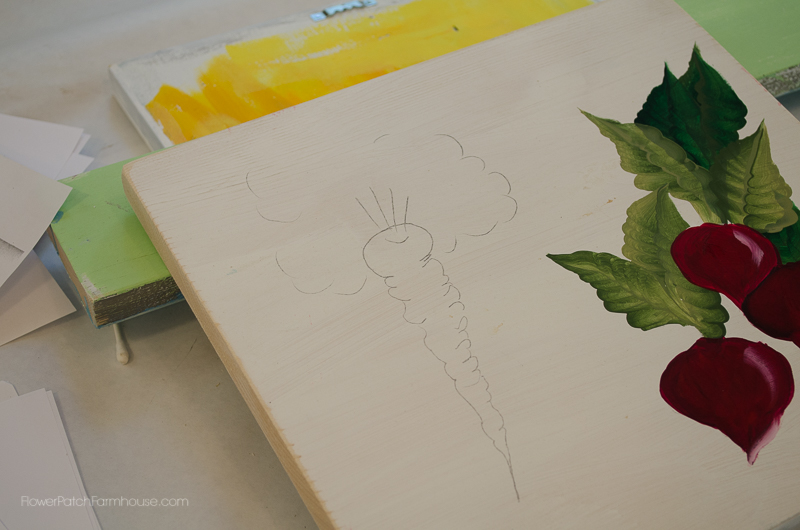
I failed to photograph the foliage on the carrot, but basically you pounce in Evergreen with a scruffy brush, then add a touch of Irish Moss as a highlight.
If you look at the foliage in the photos you can see how I did it and I hope to add the video soon.
I undercoated in Georgia Clay and a #10 flat brush.
Radish & Carrot Painting, FlowerPatchFarmhouse.com (29 of 36)
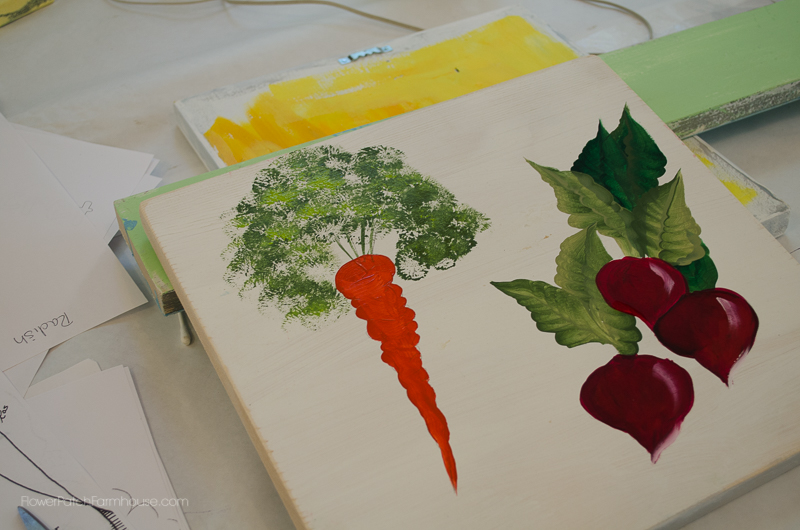
Let that dry then go over that with Tangelo Orange.
Radish & Carrot Painting, FlowerPatchFarmhouse.com (30 of 36)
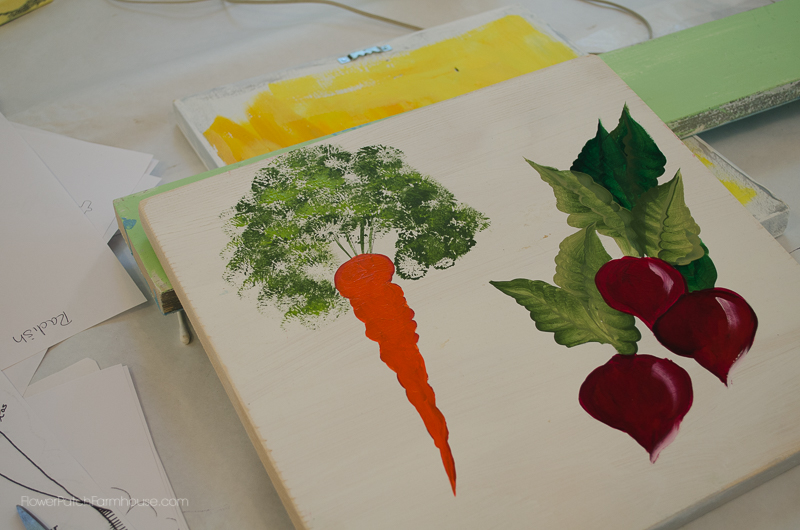
Add dimension with some shadowing, sideload the brush corner with Burnt Umber and stroke along areas to simulate creases.
With a liner brush add some little roots.

Radish & Carrot Painting, FlowerPatchFarmhouse.com (32 of 36)
Once the paint dries thoroughly either wax over it all to protect or use a coat of Varathane (only water base, an oil base will lift acrylic paints)
Oh, I almost forgot.
To do the lettering just trace over the Radish or Carrot pattern onto your surface and fill in with black paint.
Click here to view a video on how I do my lettering for most signs.
July 23 (2 of 40)
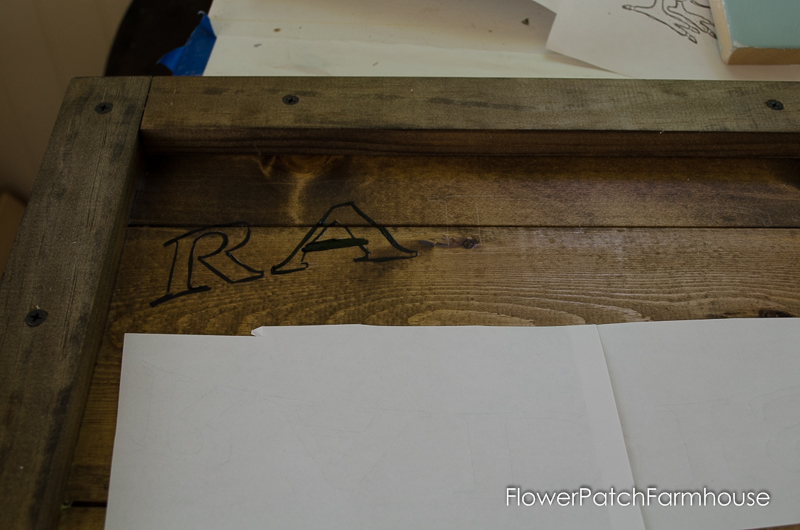
The bottom is a simple banner I taped off with painters tape and filled in then added the lettering after printing it out in Word.
Scott is my maiden name so that is why I picked Scott Seed Co. to add the finishing touch.
Here they are hanging in my studio over my painting table.
vintage seed packet signs, FlowerPatchFarmhouse
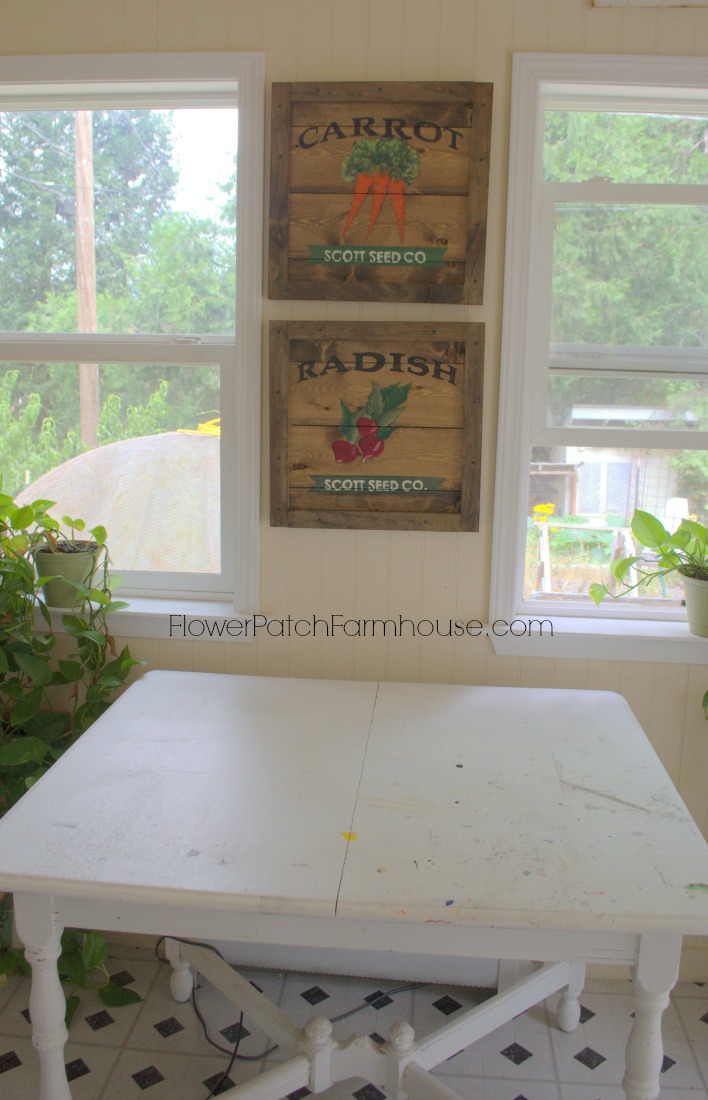
I mentioned before that I am working on the video to accompany this post, when I made it for some reason the microphone did not work so now I have to go back over and add the narration.
I will add the link to it as soon as I am done adding the audio.
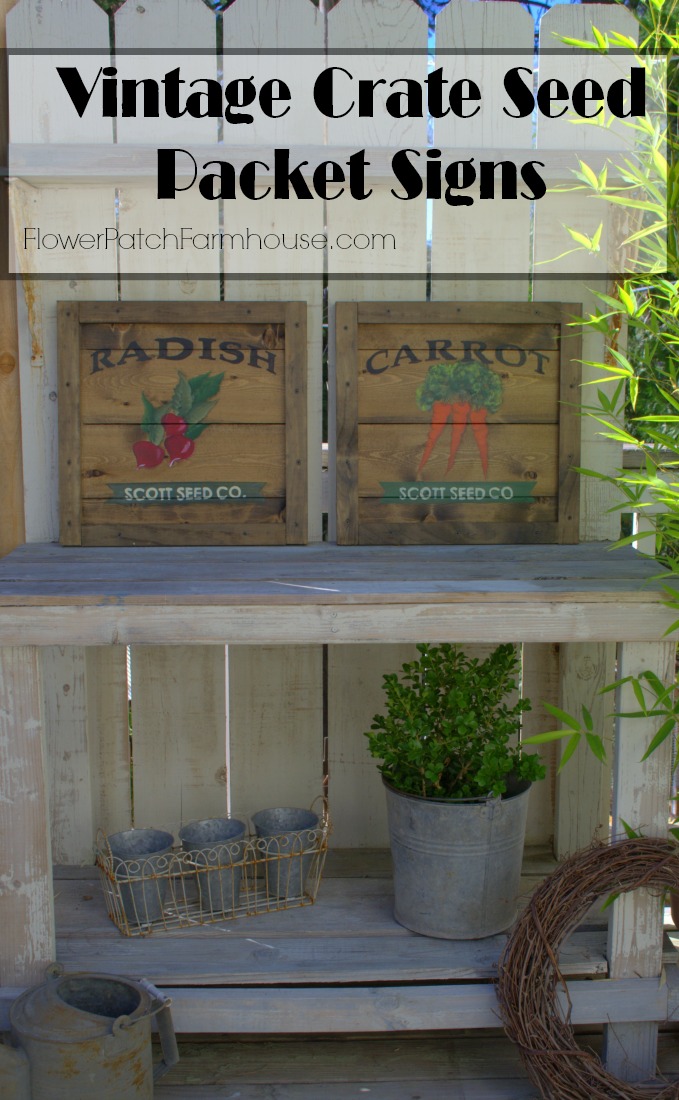
Vintage Crate Seed Packet Signs, FlowerPatchFarmhouse.com
Or if you prefer…
DIY Vintage Signs, FlowerPatchFarmhouse.com
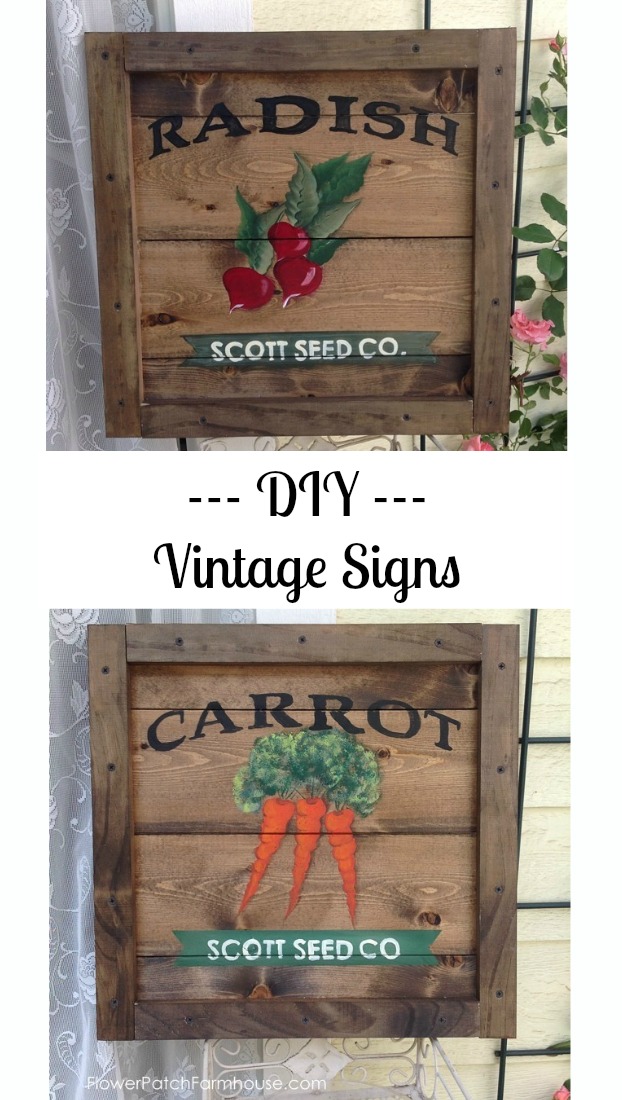
Paint away and make yourself some vintage seed packets signs soon.
Download patterns and painting supply list

Happy Painting!
signaturePamela_thumb.png

Friday, August 22, 2014

Our Favorite Broccoli Salad

Broccoli Bacon Salad, Flower Patch Farmhouse.comI have made this recipe a thousand times.
In many variations.
But this one is really our favorite.
Broccoli Salad Great Summer Eatin'It is filled with all sorts of yummy goodness.
My photos do not do it justice.
It seems my Lightroom has overexposed everything…anyone else have this issue??
Broccoli Salad makin, FlowerPatchFarmhouse.comThis salad is so easy to make and great all year round, not just in summer.
Now that I have tempted you to give it a whirl here is the recipe.

Please click here to hop over to my other blog where I have the recipe plugin to print the recipe.    I hope that isn’t too inconvenient. 
Enjoy! 
signaturePamela

Friday, August 8, 2014

Chicken Art with DecoArt Chalky Finish Paint

Disclosure: I was provided with the Chalky Finish Paint by DecoArt but the usage, opinions and ideas are my own.

chicken coop sign art with DecoArt Chalky Finish Paint, FlowerPatchFamrhouse.comAs odd as it may seem, this project is one I have wished to tackle for some time.
With such a range of colors available in DecoArts Chalky Finish paint I thought it would be fun to paint art work and not just furniture.
I do love it on furniture, in fact I am working on a table now with a mix of DecoArt Chalky Finish colors that is similar to MMS Eulalie Sky.
But that is for another post.
I started with a 1 x 12 piece of lumber, cut it to size (this one is 20inches) and painted on a base coat of Americana Decor Chalky Finish paint in Rustic.
Chicken Coop Sign, FlowerPatchFarmhouse.com (1 of 4)I let that dry and give it a coat of DecoArt Americana Decor Crackle Medium
Chicken Coop Sign, FlowerPatchFarmhouse.com (2 of 4)I either apply this with a brush or a foam roller.  I prefer a foam roller as it makes the crackling a bit more to my liking.
I let the crackle medium dry then I painted on the color Everlasting.
Chicken Coop Sign, FlowerPatchFarmhouse.com (3 of 4)I use painters tape to tape off the border, Frog Tape or Scotch Blue, both work well.
Once I have the edge sealed well with tape I paint in the border.
Chicken Coop Sign, FlowerPatchFarmhouse.com (4 of 4)I started with Cameo color then after that dried I added on a layer of Rouge for a deep red.
Chicken Coop Sign, FlowerPatchFarmhouse.com (6 of 3)Next I draw on the design, typically using a pattern and transfer paper.
I start layering in colors of paint.
Chicken Coop Sign, FlowerPatchFarmhouse.com (7 of 3)I have to mix a few colors from time to time to get a deeper or a specific color tone.
Chicken Coop Sign, FlowerPatchFarmhouse.com (8 of 3)The paint is very opaque and gives good coverage.
I did use a bottled acrylic to do the shadowing and lettering but the majority of this sign was painted with DecoArt Americana Chalky Finish Paint!
Chicken Coop Sign, FlowerPatchFarmhouse.com (9 of 1)Now to wrap it up and ship to the customer.
I have more paintings using this paint in mind so stayed tuned.
Happy Painting!
signaturePamela_thumb.png

Sunday, August 3, 2014

Happy August!

vintage rose (Pams Pink) and a bumblebeeEvery morning I walk the garden with my coffee, chat with the bumblebees, dead head a few flowers to encourage more blooms, and breathe deep of the cool, sweet scent of a summers morning.
I will share some things I saw this morning.
Oriental LilyThe Oriental Lilies are blooming and perfuming the entire garden.
The Stargazer Lilies are just fabulous.
Stargazer Lily 28, FlowerPatchFarmhouse.comThe Morning Glories are opening up, they like the heat.
These climb the lattice that obscures the untidiness under our back deck.
Morning Glories 8, FlowerPatchFarmhouse.comCerise Queen Yarrow, this one comes in several shades of pink.
This bright Fuschia is a stunner. Cerise Queen Yarrow 8, FlowerPatchFarmhouse.comMy Nearly Wild Rose is reblooming.
With those needle nose beetles gone the petals are not all pitted and holey.
Nearly Wild Rose 8, FlowerPatchFarmhouse.comThe Pow Wow Wildberry Echinacea nearby is just exploding with vibrant color.
Pow Wow Echinacea Coneflower 8, FlowerPatchFarmhouse.comThe Peace Rose is giving me full bouquets on a single cane.
Get a load of this luscious gorgeousness…
Peace Rose 28, FlowerPatchFarmhouse.comI took a close up so I could try to paint it one day.
Peace Rose 38, FlowerPatchFarmhouse.comI was tickled pink when I spotted this…
Trumpet Vine 28, FlowerPatchFarmhouse.comIt is a Trumpet Vine getting ready to bloom!
I started this one and several others from seeds I collected at an acquaintance’s home, the parent is just gorgeous and a hummingbird magnet.
I was beginning to think it would not bloom here as I put it in this spot 3 years ago and over the past few summers got not one bloom.
But look at it now.  I couldn’t be happier!
Maybe that is typical of Trumpet Vine started from seed, 3 years to bloom but since this is my first I would not know.
I am especially pleased by the 2 pink roses I planted beside my little Cottage/Studio
I had transplanted them late last Fall and did not know if they would take.
I love the pink against the yellow.
FlowerPatchFarmhouse Garden Cottage Studio July 2014 8I have tons more photos I could show but I know your eyes are already glazing over so I shall stop.
One more thing to share….
Vintage Crate Seed Packet Signs FlowerPatchFarmhouse.comThese are one of my latest projects and I hope to share the tutorial on making them very soon
(note the disclaimer “hope”, I had planned on making that tutorial this week and things popped up that got in the way. Ever have that happen??).
Oh well, such is life.
Now that I have built your anticipation I will bid you adieu!
Have a great day!
signaturePamela_thumb.png

Friday, August 1, 2014

Old Buckets and a Half Wine Barrel

Old Buckets & a Wine Barrel FlowerPatchFarmhouse

A couple years ago I did a post on my old buckets planter.
Nothing fancy but it has always been a favorite of mine.
I loved turning these old buckets into a feast for the eyes.
Old Buckets to Beautiful Planter www.flowerpatchfarmhouse.comI have planted them with violas for pretty spring but frost proof loveliness..
Old Buckets and Violas www.flowerpatchfarmhouse.comthen when things heated up and the violas drooped I traded them out for some petunias…
Old Buckets and Petunias www.flowerpatchfarmhouse.com
Sometimes I added in other things like lobelia and sweet potato vine..
Vintage Buckets Flower Tower www.flowerpatchfarmhouse.comBecause of the drought I have consolidated some of my planters,….
less to water.
So I moved my smaller buckets to a half wine barrel on my back deck and filled them again with petunias
(some were already coming up from seed in the barrel),
lobelia and a sweet potato vine I had over wintered.
Old Buckets in a Wine Barrel www.flowerpatchfarmhouse.com
They are filling in so quickly and if you look real close you can see some lobelia, though I do think the vigorous petunias may completely overshadow it soon.
DSC_0047I am always on the look out for old galvanized buckets and tubs, I can’t seem to get enough.
This sits on my back deck in full view of my kitchen window and the sliding glass doors of the dining area.
I never tire of this view and when it cools down again, too cool for petunia and lobelia it will again be festooned with violas.
Now to find some old wash tubs, you know the square shaped ones that had a stand.
I did find new ones, you can even get a clothes wringer to go with it.
Probably not a bad idea if we had some kind of disaster where we had no electricity, at least we could have clean clothes.
Other than working in the garden I have been painting away…I will share what I have been painting next time.
Ta ta…Until next time.
signaturePamela_thumb.png

Related Posts Plugin for WordPress, Blogger...